This article records the steps to implement subreports and their master report using JasperReport (iReport) and deploy them to SpagoBI reporting server.
Both sub-reports and master report are reports. Sub-reports, like building blocks, can be insert into master report to generate complex reports.
Environment
============
============
SpagoBI: version 2.5
Data Source: OE example database on Oracle 11g R2
Data Source: OE example database on Oracle 11g R2
iReport : version 3.7.3
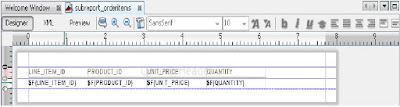
1) Create a sub-report to display the order items detail for one order.
Open iReport, create the order items detail report -- “subreport_orderitems”
Report Query:

Report Layout:
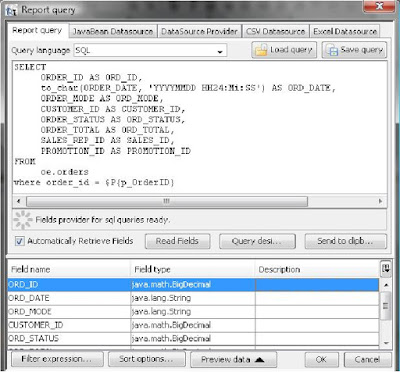
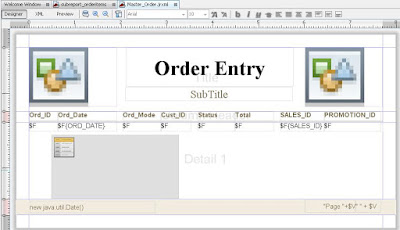
2) Create the master report to show order level data and insert the sub-report (detail) to show the order item level data.
Using iReport to create the master (order level) report -- “Master_Order”
Report Query:
Report Layout:
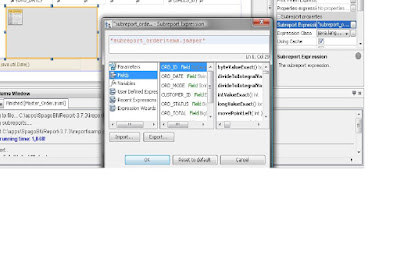
Sub-report Parameter:
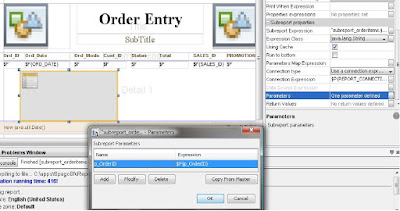
Setup sub-report parameter(s) in master report will let master report know how to pass values to sub-0report.
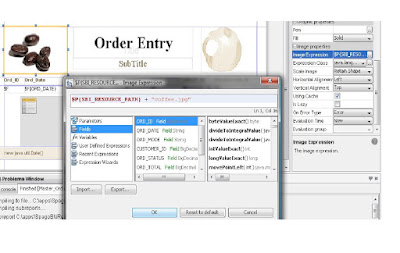
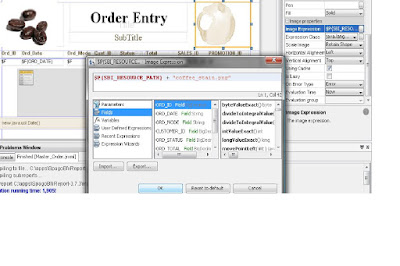
Create a variable (parameter) -- “SBI_RESOURCE_PATH”
On SpagoBI reporting server, this variable will point to folder: Tomcat_home/resources/img/
Later, we will copy resource files (needed by this example) to the above folder on SpagoBI server.
On developer workstation (in iReport), we can set this variable a default value to point to a local folder where the image files reside.
Resource - Image Expression
And
Subreport Expression:
The subreport file (“subreport_orderitems”) should be just referenced (or pointed) by its name in master report (“Master_Order”).
Finally, test the Master / subreport.
3) Prepare to deploy to SpagoBI reporting server
Copy the resource files (in this example, two image files “coffee.jpg” and “coffee_stain.png”) from your local developing environment to the folder on SpagoBI reporting server: Tomcat_home/resources/img/
4) Deploy to SpagoBI reporting server
First, add an analytical driver for the parameter (in this example, the parameter name is “p_OrderID”) used in the report, as below:
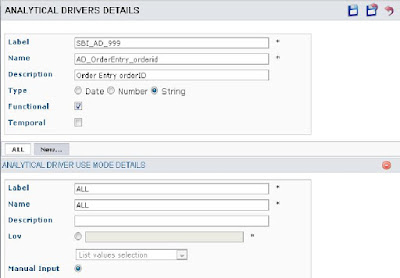
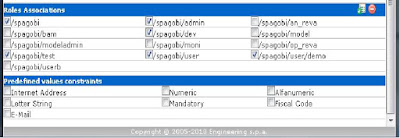
You may also need to specify the “Roles Associations” and “Predefined Value Constraints” for this parameter.
Click the “Save and return” button.
Then, click “insert” button to insert the “Document” for sub-report:
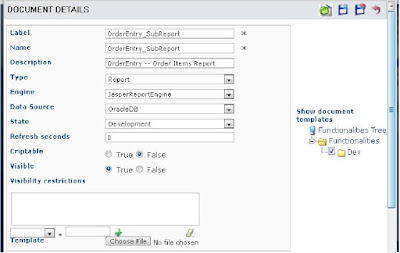

Click the “Save and return” button.
Next, click “insert” button to insert a “Document” for the Master report:
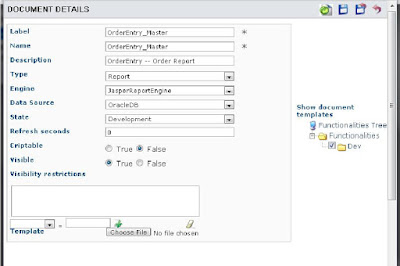
Click the “Save and return” button.
Click the “Save and return” button.
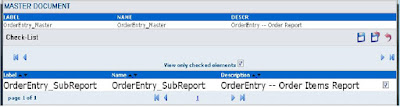
Test the Master report:
Click “User Menu” --> “Documents Execution”, and run the report “OrderEntry_Master”:

Final report output:


